This tutorial follows up on my Scripting in Anime Studio - The basics tutorial, if you have not seen it, I strongly suggest you check it out before dwelling into this more advanced tutorial.
In this tutorial, we will tackle the tool scripts in Anime Studio, which are more advanced scripts, with the possibilities of much more options then the menu script discussed in my previous scripting tutorial.
We will go deeper into the basics of scripting, we will talk more about tables, which We will use as arrays, then we will dig a little further into variables, functions, conditional statements, loops and some more of the tools available for scripting in Anime Studio..
We will learn more about the functions and classes available in the Anime Studio scripting interface, like the CheckBox(), StaticText() and TextControl() functions, to name a few.
At the end of this tutorial, you should be more comfortable and have a better understanding of Lua scripting for Anime Studio in general.
This tutorial is quite lengthy and look at some rather technical aspects of programming, but do not worry, We will take the time to look at all these tools one at a time, and I will do my best to explain them thoroughly before getting into the next one.
If you really are interested in learning scripting for Anime Studio then you need to understand that this is a process that take a bit of time, so I suggest you read the tutorial without trying to get it all, then read it a few more times, as it will sink in a little more each time.
Now, before We get into scripting, We need to have a basic look at some of the scripting tools We will use in our script.
ASSIGNMENTS: Assignments are special characters that allows you to change the value of a variable or table, the most used assignment character is =.
var1 = "Hello World" assigns the string value "Hello World" to the global variable var1.
VARIABLES: Variables are containers, they can hold almost any type of data, that is, string(text), numbers(0-9), booleans (true or false) and few others.
There are two main types of variables in Lua...
Global variables: Global variables are variables that are available throughout the script, you create a global variable like this...
var1 = "Hello World"
This creates a global variable named "var1" containing the text string "Hello World", that will be available to the the entire script, including functions, conditional statements or loops.
Local variables: Local variables are variables that are available only inside the chunk of script where they we're created. That includes functions, conditional statements or loops.
So, if you create a local variable inside a function, that variable will exist only inside that function and will not be available for other part of your script.
Local variables are defined with the reserved keyword "local"
function myFunction()
myGlobalVar = "This is a global variable"
local myLocalVar = "This is a local variable"
print(myGloalVar)
print(myLocalVar)
end --//
print(myGloalVar)
print(myLocalVar)
myGlobalVar = "This is a global variable"
local myLocalVar = "This is a local variable"
print(myGloalVar)
print(myLocalVar)
end --//
print(myGloalVar)
print(myLocalVar)
First line of this code creates the function "myFunction"
Second line creates the global variable "myGlobalVar" and assigns the string "This is a global variable" to it.
Third line creates the local variable "myLocalVar" and assigns the string "This is a local variable" to it.
fourth and fifth lines prints the content of both variable to the Lua console.
The sixth line ends the function call.
The next line prints the content of the global variable outside the function, this works, since it was created as a global variable.
The next line tries to print the local variable myLocalVat outside of the function, but since myLocalVar is a local variable that was created inside of the function "myFunction", it cannot exist outside of it, so nothing is printed.
FUNCTIONS: Functions are small scripts that run inside of our main script, there are three types of functions available to us to make scripts for Anime Studio.
Prebuild functions that are part of the Lua architecture, like print(), dofile(), type() etc.
Prebuild functions that are part of Anime Studio scripting interface, like OpenFile(), SaveFile() or Alert()
Custom functions that We build ourselves to execute any type of actions using the Anime Studio scripting interface or any of the Lua constants, functions and classes.
A user define function is build using the function() class, here is a basic example of a function.
myFunction("world")
function myFunction(pararm)
print("Hello ")
print(param)
end
function myFunction(pararm)
print("Hello ")
print(param)
end
On the first line We call the myFunction "myFunction", passing it the word "world" as a parameter.
Then We create a user defined function called myFunction.
We put the parameters name "param" within the parentheses that will be used to store the parameter from the function call.
Within the body of the function We print the word "Hello", then on the second line We print the parameter "param", that was used to store the word "world" from the function call.
Then We end the function with the reserved word "end".
Functions are one of the most important concept to understand to be able to script in Lua, as almost everything runs from inside a function.
TABLE: Tables in Lua are used to structure data, any type of data. With tables We can manage databases, arrays, multi-dimensional arrays and much more, they are all build with tables in Lua.
Arrays: Arrays are indexed variables, nothing more really. Here is an example.
myFruitArray = {}
myFruitArray[1] = "Apple"
myFruitArray[2] = "Orange"
myFruitArray[3] = "Banana"
myFruitArray[4] = "Pineapple"
myFruitArray[5] = "Kiwi"
local myFruitVar = myFruitArray[3]
print(myFruitVar) --//prints Banana
myFruitArray[1] = "Apple"
myFruitArray[2] = "Orange"
myFruitArray[3] = "Banana"
myFruitArray[4] = "Pineapple"
myFruitArray[5] = "Kiwi"
local myFruitVar = myFruitArray[3]
print(myFruitVar) --//prints Banana
On the first line we create/declare a table named "myFruitArray"
In the next five lines We assign string data to our newly created table/array with an index from 1 to 5 for each entry.
Then We create/declare a local variable named "myFruitVar", then We assign the value myFruitArray[3] to the variable, which is Banana.
On the last line We print the content of our formatted variable to the screen, "Banana".
There are many ways to fill and array with data in a Lua table, here is another way.
myFruitArray = {"Apple", "Orange", "Banana", "Pineapple", "Kiwi"}
In this example, We define an array named myFruitArray by passing it a successive string of data separate by comas.
Entries are automatically assigned an index as they are assigned.
With Lua tables, index start at 1, and not 0 as with most other languages. This is the same as.
myFruitArray = {}
myFruitArray[1] = "Apple"
myFruitArray[2] = "Orange"
myFruitArray[3] = "Banana"
myFruitArray[4] = "Pineapple"
myFruitArray[5] = "Kiwi"
myFruitArray[1] = "Apple"
myFruitArray[2] = "Orange"
myFruitArray[3] = "Banana"
myFruitArray[4] = "Pineapple"
myFruitArray[5] = "Kiwi"
You can read more about tables and arrays in Lua in the online book refferred to at the end of this tutorial, as they are an important concept of scripting with Lua.
CONDITIONNAL STATEMENT: Conditional structure checks if a statement is true or false, and react upon it. It uses the IF/Then pair.
Here is an example.
local myFruitVar = "avocado"
if(myFruitVar == "apple") then
print("This fruit is an apple")
elseif(myFruitVar == "orange") then
print("This fruit is an orange")
elseif(myFruitVar == "banana") then
print("This fruit is a bamama")
elseif(myFruitVar == "pineapple") then
print("This fruit is a pineapple")
elseif(myFruitVar == "kiwi") then
print("This fruit is a kiwi")
else
Print("I do not know what fruit!")
end
On the first line We create/declare a local variable named "myFruitVar" and assign it the string value of "avocado"
Then We use the IF statement and compare myFruitVar with "apple".
If the string in myFruitVar was "apple", then the next line would be executed and "This fruit is an apple" would be printed, but since this is not the case, it goes to the next line.
The next line compares myFruitVar to "orange", they are not the same, so We go to the next statement.
The next statement compare myFruitVar to "banana", and again, they do not match, so We go to the next statement.
Since none of the strings We compare to myFruitVar matches, the statement goes to the last statement, which is else.
Else is a statement We put at the end of an IF/Then statement in case none of the queries work, which is the case in our example, so the else statement is executed and the next line prints "I do not know what fruit!"
You can embed IF/Then statement into one another, making for more complex queries, like this.
local myfruitVar = "avocado"
if(myFruitVar == "apple") then
print("This fruit is an apple")
if(myFruitVar == "orange") then
print("This fruit is an orange")
if(myFruitVar == "banana") then
print("This fruit is a bamama")
if(myFruitVar == "pineapple") then
print("This fruit is a pineapple")
if(myFruitVar == "kiwi") then
print("This fruit is a kiwi")
else
Print("I do not know what fruit!")
end
end
end
end
end
end
end
You can also check if two variables are identical, as in this.
if(myFruitVar == "apple") or (myFruitVar == "orange") or (myFruitvar == "banana") or (myFruitVar == "pineapple") or (myFruitVar == "kiwi") then
print("This is a know fruit")
else
print("I do not know what fruit!")
end
print("This is a know fruit")
else
print("I do not know what fruit!")
end
These are similar but do not give the exact same results.
You can also check if two variables are more then, or less then, like this.
local numVar = 5
if(numVar < 1) or (numVar > 10) then
print("Number is either smaller then 1 or larger then 10")
else
print("Number between 1 and 10")
end
if(numVar < 1) or (numVar > 10) then
print("Number is either smaller then 1 or larger then 10")
else
print("Number between 1 and 10")
end
You can mix these about as much as you want and buld very complex decision making routines for your scripts.
LOOPS: Loops are used to go through data or to repeat execution of codes or statement.
There are two main functions for loops, while() and for(), here are some examples.
myFruitArray = {}
myFruitArray[1] = "Apple"
myFruitArray[2] = "Orange"
myFruitArray[3] = "Banana"
myFruitArray[4] = "Pineapple"
myFruitArray[5] = "Kiwi"
local i = 1
while myFruitArray[i] do
print(myFruitArray[i])
i = i + 1
end
myFruitArray[1] = "Apple"
myFruitArray[2] = "Orange"
myFruitArray[3] = "Banana"
myFruitArray[4] = "Pineapple"
myFruitArray[5] = "Kiwi"
local i = 1
while myFruitArray[i] do
print(myFruitArray[i])
i = i + 1
end
In the first line of this example We create a table names myFruitArray.
Then We insert data in the table, as an array.
Then We create a local variable named i and We assign it the value 1
We then use the while() function to check and see if myFrruitArray has a value at index i, if it does, then the next line prints the value of myFruitArray[i].
Then the counter, i, is incremented by one.
Then while checks if the next index of myFruitArray has a value, and prints it.
In this example the while loop will go around 5 times and prints all the fruits name stored in the array. The loop will stop by itself when there is no more index in the array.
Now an example of the for() function.
myFruitArray = {}
myFruitArray[1] = "Apple"
myFruitArray[2] = "Orange"
myFruitArray[3] = "Banana"
myFruitArray[4] = "Pineapple"
myFruitArray[5] = "Kiwi"
for (1, 5) do
print(myFruitArray[i]
end
myFruitArray[1] = "Apple"
myFruitArray[2] = "Orange"
myFruitArray[3] = "Banana"
myFruitArray[4] = "Pineapple"
myFruitArray[5] = "Kiwi"
for (1, 5) do
print(myFruitArray[i]
end
The for starts counting from 1, to 5, then prints the content of myFruitArray from index 1 to 5.
For works similarly as while, but give an error message if no data is found, instead of while that detects it and exist.
You can exit from a while() or for() loop with the break statement.
local i = 1
while i > 0 do
i = i + 1
end
while i > 0 do
i = i + 1
end
In this example We create a local variable named i, which will act as a counter, then We assign 1 as its starting value.
Then the while() class checks if i > 0, which is the case, so it goes to the next line, on which the counter is incremented and the loop continues.
This loop will continue counting until it overflows, which is a bit useless.
Lets have a look at another example where We insert a break statement.
local i = 1
while i > 0 do
if(i > 10) then
break
end
i = i + 1
end
while i > 0 do
if(i > 10) then
break
end
i = i + 1
end
In this example, the while() starts its loop with the counter starting at 1, then the counter gets incremented, as in the previous example.
The main difference here is that We included an IF statement with a break in it, so, when the counter get incremented passed the number 10, the IF compares it then execute the break, ending the loop.
Loops are very important in any scripting languages, and when coupled with decision making statements like the IF, they form the building blocks of good scripting.
CLASSES: Classes are like super functions, and by that I mean that they are large functions with many sub-functions.
In other words, instead of having to script many different functions that do similar things, you call a class and use the sub-functions to do what you need.
This is called object oriented programming, or OOP.
An example could be the M_Curve() class, which deals with a curve in a vector layer and supports many sub-functions like.
CountPoints(), which counts the points on a selected segment.
Point(), which access a given point on a selected curve.
CountSegments(), which counts the number of segments on a selected curve.
And many more.
All of the sub-functions are all related to curve functionality and they all reside on the M_Curve class.
This type of thinking greatly simplifies the job of scripting and make code very reusable.
Lets have a look at some of the common classes available in the Anime Studio scripting interface and how they work.
M_Mesh, the M_Mesh class is a container for vector shapes in a vector layer. It can contain points, curves, and fill and outline shapes.
It is the most common class We will use in our script.
M_Mesh is usually called this way.
local mesh = moho:Mesh(), which assigns the class to a local variable.
Some of the common sub-functions or member functions of M_Mesh are.
CountPoints(), which returns the number of points in the current vector layer.
A common way to call CountPoints() may look like this.
local numPoints = mesh:CountPoints(), which assigns the value gathered by CountPoints() to a local variable.
Point(), which gets access to a point in the selected vector layer.
A common use of point is.
mesh:Point(pointID).fSelected = true, which applies fSelected to the point defined by pointID.
Curve(), which gets access to a curve in the selected vector layer.
A common use of Curve() is.
local curveVar = mesh:Curve(curveID), which assigns the curve defined by curveID to the local variable curveVar.
AddPoint(), which add a new point to a curve.
A common use of AddPoint() is.
mesh:AddPoint(pos, curveID, segID, 0), which add a new point on the curve defined by curveID, on the curve segement defined by segID, at the position defined by pos on frame 0.
WeldPoint(), which welds two point on a selected curve together.
A common use of WldPoints() is.
mesh:WeldPoints(1, 5, 0), which weld point 1 to point 5 at frame 0.
If point 5 is not directly on top of point 1, point 5 will be moved to the location of point 1 and then welded to it.
ScalePoints(), which scales the selected points.
A common use of ScalePoints() is.
mesh:ScalePoints(.9, .9, mesh:SelectedCenter()), which scales the selected points at 90% from the center of the selection.
SelectConnected(), which selects all the points from curves with any amount of points selected on them.
A common use of SelectConnect() is.
mesh:SelectConnected()
This is but a taste of all the classes and sub-functions available through the Anime Studio scripting interface. For a complete list have a look at the documents linked at the end of this tutorial.
Now that We had a closer look at some of the tools We need to build our script, lets have a look at it.
The script we are going to build is called gc_gear.lua, and guess what it does, you guessed it, it makes gears, darn you're good! :)
The way the script works is simple, you select its icon, a menu appears, you choose whether it generates a fill and outline, select a size then press Create, presto, instant gear!

You can find the finished script here. gc_gear.zip
Now lets have a look at the code, then I will take it apart with you!
-- **************************************************
-- Provide Moho with the name of this script object
-- **************************************************
ScriptName = "gc_gear"
-- **************************************************
-- General information about this script
-- **************************************************
gc_gear = {}
function gc_gear:Name()
return "Create Gear"
end
function gc_gear:Version()
return "1.0"
end
function gc_gear:Description()
return "Create a Gear"
end
function gc_gear:Creator()
return "Gilles Charbonneau"
end
function gc_gear:UILabel()
return("Create Gear")
end
function gc_gear:LoadPrefs(prefs)
self.autoFill = prefs:GetBool("gc_gear.autoFill", true)
self.autoOutline = prefs:GetBool("gc_gear.autoOutline", true)
self.gearSize = prefs:GetInt("gc_gear.gearSize", 3)
end
function gc_gear:SavePrefs(prefs)
prefs:SetBool("gc_gear.autoFill", self.autoFill)
prefs:SetBool("gc_gear.autoOutline", self.autoOutline)
prefs:SetInt("gc_gear.gearSize", self.gearSize)
end
function gc_gear:ResetPrefs()
self.autoFill = true
self.autoOutline = true
self.gearSize = 3
end
-- **************************************************
-- Create menus and handle their responses
-- **************************************************
gc_gear.TITLE = MOHO.MSG_BASE
gc_gear.AUTOFILL = MOHO.MSG_BASE + 1
gc_gear.AUTOOUTLINE = MOHO.MSG_BASE + 2
gc_gear.GEARSIZE = MOHO.MSG_BASE + 3
gc_gear.CREATE = MOHO.MSG_BASE + 4
gc_gear.autoFill = true
gc_gear.autoOutline = true
gc_gear.gearSize = 3
function gc_gear:DoLayout(moho, layout)
layout:AddChild(LM.GUI.StaticText("GEARS: "))
self.autoFillCheck = LM.GUI.CheckBox("Auto-fill", self.AUTOFILL)
layout:AddChild(self.autoFillCheck)
self.autoOutlineCheck = LM.GUI.CheckBox("Auto-outline", self.AUTOOUTLINE)
layout:AddChild(self.autoOutlineCheck)
layout:AddChild(LM.GUI.StaticText("Choose a gear size:"))
self.gearSizeTxt = LM.GUI.TextControl(0, 3, self.GEARSIZE, LM.GUI.FIELD_UINT)
layout:AddChild(self.gearSizeTxt)
layout:AddChild(LM.GUI.Button("Create", self.CREATE))
end
function gc_gear:UpdateWidgets(moho)
self.autoFillCheck:SetValue(self.autoFill)
self.autoOutlineCheck:SetValue(self.autoOutline)
self.gearSizeTxt:SetValue(self.gearSize)
end
function gc_gear:HandleMessage(moho, view, msg)
if (msg == self.AUTOFILL) then
tempFill = self.autoFillCheck:Value()
self.autoFill = tempFill
elseif (msg == self.AUTOOUTLINE) then
tempOutline = self.autoOutlineCheck:Value()
self.autoOutline = tempOutline
elseif (msg == self.GEARSIZE) then
tempSize = self.gearSizeTxt:IntValue()
if (tempSize < 1) or (tempSize > 5) then
LM.GUI.Alert(LM.GUI.ALERT_INFO, "Only values from 1 to 5 are accepted")
return
end
self.gearSize = tempSize
elseif (msg == self.CREATE) then
tempSize = self.gearSizeTxt:IntValue()
tempFill = self.autoFill
tempOutline = self.autoOutline
if (tempSize < 1) or (tempSize > 5) then
LM.GUI.Alert(LM.GUI.ALERT_INFO, "Only values from 1 to 5 are accepted")
else
gc_gear:creategear(moho, tempSize, tempFill, tempOutline)
end
end
end
-- **************************************************
-- The guts of this script
-- **************************************************
function gc_gear:creategear(moho, tempSize, tempFill, tempOutline)
local mesh = moho:Mesh()
if (mesh == nil) then
return
end
local circleCurvature = 0.391379
local v = LM.Vector2:new_local()
moho.document:PrepUndo(moho.layer)
moho.document:SetDirty()
mesh:SelectNone()
gearArray = {}
gearArray[1] = {curves=3, curve1=0.02, curve2=0, curve3=.05, curve4=0.1, splitCurve=9, scale=.75}
gearArray[2] = {curves=4, curve1=0.04, curve2=0.06, curve3=0.15, curve4=0.2, splitCurve=19, scale=.88}
gearArray[3] = {curves=4, curve1=0.06, curve2=0.09, curve3=0.25, curve4=0.3, splitCurve=29, scale=.92}
gearArray[4] = {curves=4, curve1=0.08, curve2=0.15, curve3=0.35, curve4=0.4, splitCurve=39, scale=.94}
gearArray[5] = {curves=4, curve1=0.1, curve2=0.15 , curve3=0.45, curve4=0.5, splitCurve=49, scale=.955}
for i = 1, 4 do
local curveTemp = "curve" .. i
local pointTemp = gearArray[tempSize][curveTemp]
if(pointTemp ~= 0) then
v.x = -pointTemp
v.y = 0
mesh:AddLonePoint(v, moho.layerFrame)
v.x = 0
v.y = pointTemp
mesh:AppendPoint(v, moho.layerFrame)
v.x = pointTemp
v.y = 0
mesh:AppendPoint(v, moho.layerFrame)
v.x = 0
v.y = -pointTemp
mesh:AppendPoint(v, moho.layerFrame)
v.x = -pointTemp
v.y = 0
mesh:AppendPoint(v, moho.layerFrame)
local numPoints = mesh:CountPoints()
mesh:WeldPoints(numPoints-1, numPoints-5, 0)
local numPoints = mesh:CountPoints()
for ii = 1, 4 do
mesh:Point(numPoints-ii):SetCurvature(circleCurvature, 0)
end
end
end
local numPoints = mesh:CountPoints()
mesh:SelectNone()
mesh:Point(numPoints-1).fSelected = true
mesh:SelectConnected()
local splitCount = gearArray[tempSize]["splitCurve"]
for curveID = 0, mesh:CountCurves() - 1 do
local curve = mesh:Curve(curveID)
local ptCount = curve:CountSegments() * splitCount
local pts = {}
for segID = curve:CountSegments() - 1, 0, -1 do
if (curve:IsSegmentSelected(segID)) then
for i = splitCount, 1, -1 do
local v = curve:PointOnSegment(segID, i / (splitCount + 1))
table.insert(pts, v)
end
end
end
local ptID = 1
for segID = curve:CountSegments() - 1, 0, -1 do
if (curve:IsSegmentSelected(segID)) then
for i = 0, splitCount - 1 do
mesh:AddPoint(pts[ptID], curveID, segID, moho.layerFrame)
ptID = ptID + 1
end
end
end
end
local numPoints = mesh:CountPoints()
local newPoints = splitCount * 4 + 4
local startPoint = numPoints - newPoints
for i = startPoint, numPoints-1 do
mesh:Point(i):SetCurvature(MOHO.PEAKED, 0)
end
mesh:SelectNone()
basePointsArray = {startPoint, startPoint+3, startPoint+2, startPoint+1}
pointsArray = {}
arrayCounter = 1
arrayCounter2 = 1
for i = 1, 4 do
pointsArray[arrayCounter] = basePointsArray[i]
arrayCounter = arrayCounter + 1
for ii = ((startPoint + 3) + arrayCounter2), (((startPoint + splitCount) + arrayCounter2) + 2) do
pointsArray[arrayCounter] = ii
arrayCounter = arrayCounter + 1
arrayCounter2 = arrayCounter2 + 1
end
end
for i = 1, newPoints, 4 do
mesh:Point(pointsArray[i]).fSelected = true
mesh:Point(pointsArray[i+1]).fSelected = true
end
local scaleVar = gearArray[tempSize]["scale"]
mesh:PrepMovePoints()
mesh:ScalePoints(scaleVar, scaleVar, mesh:SelectedCenter())
moho:AddPointKeyframe(moho.frame)
local numPoints = mesh:CountPoints()
local numCurves = gearArray[tempSize]["curves"]
local newPoints = numPoints - ((splitCount * 4) + (numCurves * 4))
mesh:SelectNone()
mesh:Point(numPoints-1).fSelected = true
mesh:Point(newPoints).fSelected = true
mesh:SelectConnected()
local shapeID = moho:CreateShape(tempFill)
mesh:Shape(shapeID).fHasOutline = tempOutline
mesh:SelectNone()
mesh:Point(newPoints+5).fSelected = true
mesh:Point(newPoints+9).fSelected = true
mesh:SelectConnected()
local shapeID = moho:CreateShape(false)
mesh:Shape(shapeID).fHasOutline = tempOutline
mesh:Point(numPoints-1).fSelected = true
mesh:Point(newPoints).fSelected = true
mesh:SelectConnected()
moho:UpdateUI()
end
First of, every lines that starts with -- is a comment, these are not taken in consideration by the script. The ***** are just to make things look pretty!
The actual first line of code is
ScriptName = "gc_gear"
This is where we tell the name of our script, The name of the script can be anything you like.
Usually the name of a script starts with the initials of the person who wrote it, in this case I started the name with gc, for Gilles Charbonneau, as this also help differentiate the script and prevent it from conflicting with other scripts.
-- **************************************************
-- General information about this script
-- **************************************************
-- General information about this script
-- **************************************************
This comment tells us that we are in the general section of the script. This section holds several functions that store the general values of the script.
Most of this information is necessary for all scripts, you need to have these in all the script you will make.
gc_gear = {}
On this line we create a table, as We learned before, tables hold the structure of all data in Lua.
You can have a closer look at tables in the online manual listed at the bottom of this tutorial as it is an important concept for scripting with Lua.
function gc_gear:Name()
return "Create a gear"
end
return "Create a gear"
end
Here we enter the name of the script as it will appear in Anime Studio menus.
As you can see, We use the table We created in conjunction with the Name() class to store the name of the script.
This way, Anime Studio can reference gc_drawcircle:Name() at any given time to get the name of the script. We will do the same for the rest of the general information.
function gc_gear:Version()
return "1.0"
end
return "1.0"
end
Here you insert the current development version of your script, scripters often put in the lowest version of Anime Studio your script can run in.
function gc_gear:Description()
return "Draws a circle on the workspace"
end
return "Draws a circle on the workspace"
end
Here you enter the description for you script that will appear right on top of Anime Studio workspace.
function gc_gear:Creator()
return "Gilles Charbonneau."
end
return "Gilles Charbonneau."
end
Here you enter the name of the creator of the script, in this case me, Gilles Charbonneau.
function gc_gear:UILabel()
return("Draw Circle")
end
return("Draw Circle")
end
Here We insert the title of the script as it will appear in either the Scripts drop-down window or as users will pass their mouse cursor on top of the script icon in the tools palette.
function gc_gear:LoadPrefs(prefs)
self.autoFill = prefs:GetBool("gc_gear.autoFill", true)
self.autoOutline = prefs:GetBool("gc_gear.autoOutline", true)
self.gearSize = prefs:GetInt("gc_gear.gearSize", 3)
end
self.autoFill = prefs:GetBool("gc_gear.autoFill", true)
self.autoOutline = prefs:GetBool("gc_gear.autoOutline", true)
self.gearSize = prefs:GetInt("gc_gear.gearSize", 3)
end
In this block of code We load the saved data of our script, that is, the current state of the interface of our script the last time We closed Anime Studio.
We use the GetBool() function, to retrieve the saved values for the autoFill and autoOutline fields of our script, so when We open Anime Studio again, those fields can be populated with the same values they had when Anime Studio was last closed.
We also retrieve the saved value of the gear size of our menu with the GetInt() function.
function gc_gear:SavePrefs(prefs)
prefs:SetBool("gc_gear.autoFill", self.autoFill)
prefs:SetBool("gc_gear.autoOutline", self.autoOutline)
prefs:SetInt("gc_gear.gearSize", self.gearSize)
end
prefs:SetBool("gc_gear.autoFill", self.autoFill)
prefs:SetBool("gc_gear.autoOutline", self.autoOutline)
prefs:SetInt("gc_gear.gearSize", self.gearSize)
end
In this block of code We save the current values of our script to 3 different variables, gc_gear.autoFill, gc_gear.autoOutline and gc_gear.gearSize.
We pass them the current value of the field of our script, which are self.autoFill, self.autoOutline and self.gearSize.
That information will be used by the loadPrefs function, that will retrieve that data next time you start Anime Studio and will restore the saved values of the script menu.
function gc_gear:ResetPrefs()
self.autoFill = true
self.autoOutline = true
self.gearSize = 3
end
self.autoFill = true
self.autoOutline = true
self.gearSize = 3
end
In this block of text We set the default values for the script that will be used when you use the reset function on the script menu.
The self.autoFill and self.autoOutline are the values of the check boxes for auto-fill and auto-outline on the script menu, and the default values are true, or checked.
self.gearSize if the default value of the gear size text box, which defaults to 3.
-- **************************************************
-- Create menus and handle their responses
-- **************************************************
-- Create menus and handle their responses
-- **************************************************
This block of comments tells us that We enter the part of the script dealing with the creation of menus and We process the information entered in the different menu fields so it can be used by the rest of the script.
gc_gear.TITLE = MOHO.MSG_BASE
gc_gear.AUTOFILL = MOHO.MSG_BASE + 1
gc_gear.AUTOOUTLINE = MOHO.MSG_BASE + 2
gc_gear.GEARSIZE = MOHO.MSG_BASE + 3
gc_gear.CREATE = MOHO.MSG_BASE + 4
gc_gear.AUTOFILL = MOHO.MSG_BASE + 1
gc_gear.AUTOOUTLINE = MOHO.MSG_BASE + 2
gc_gear.GEARSIZE = MOHO.MSG_BASE + 3
gc_gear.CREATE = MOHO.MSG_BASE + 4
Here we declare menu spaces for the elements of the menu, that is, the title, the auto-fill checkbox, the auto-outline checkbox, the gear size text field and the create button.
gc_gear.autoFill = true
gc_gear.autoOutline = true
gc_gear.gearSize = 3
gc_gear.autoOutline = true
gc_gear.gearSize = 3
In this code We set the menu variables with their default values.
function gc_gear:DoLayout(moho, layout)
Here We create the DoLayeout function that will hold all the parts of our menu. We use the moho module and We give the function the name layout.
layout:AddChild(LM.GUI.StaticText("GEARS: "))
Here We call the StaticText() function to define the title of our menu by passing it the text string "Gear: " and We use the function AddChild to add it to the menu.
self.autoFillCheck = LM.GUI.CheckBox("Auto-fill", self.AUTOFILL)
layout:AddChild(self.autoFillCheck)
layout:AddChild(self.autoFillCheck)
Here We use the function CheckBox() to create a checkbox on our menu, We use the label "Auto-fill" and We name it self.AUTOFILL.
We then use the AddChild() function to add it to the menu.
self.autoOutlineCheck = LM.GUI.CheckBox("Auto-outline", self.AUTOOUTLINE.
layout:AddChild(self.autoOutlineCheck)
layout:AddChild(self.autoOutlineCheck)
We do the same with the second checkbox, giving it the label "Auto-outline" and We name it self.AUTOOUTLINE.
Then We add it to the menu with the function AddChild().
layout:AddChild(LM.GUI.StaticText("Choose a gear size:"))
This time We add some more static text with the StaticText() function, assigning it the text string "Choose a gear size".
self.gearSizeTxt = LM.GUI.TextControl(0, 3, self.GEARSIZE, LM.GUI.FIELD_UINT)
layout:AddChild(self.gearSizeTxt)
layout:AddChild(self.gearSizeTxt)
Now We add a dynamic text field with the textControl() function, give it a length of 0, give it a default value of 3, We name it self.GEARSIZE and We make it a integer field with the switch FIELD_UINT, which makes sure that only positive integer numbers can be entered.
We then use the AddChild() function to add it to the menu.
layout:AddChild(LM.GUI.Button("Create", self.CREATE))
end
end
Now for the last part of our menu, the create button.
We give it the label "Create" then We name it self.CREATE.
We now have a menu that looks like this.
function gc_gear:UpdateWidgets(moho)
self.autoFillCheck:SetValue(self.autoFill)
self.autoOutlineCheck:SetValue(self.autoOutline)
self.gearSizeTxt:SetValue(self.gearSize)
end
self.autoFillCheck:SetValue(self.autoFill)
self.autoOutlineCheck:SetValue(self.autoOutline)
self.gearSizeTxt:SetValue(self.gearSize)
end
In this block of code, We use the UpdateWidgets() function to update our menu selections as We change them.
function gc_gear:HandleMessage(moho, view, msg)
Here We create the function HandleMessage with entries for 3 parameters, the moho module, the view, and the message passed from the menu.
if (msg == self.AUTOFILL) then
tempFill = self.autoFillCheck:Value()
self.autoFill = tempFill
tempFill = self.autoFillCheck:Value()
self.autoFill = tempFill
Here We have our first conditional statement.
IF checks if the msg variable that was passed to the handleMessage function contains the name self.AUTOFILL.
If this is the case, in other words, if the checkbox autofill was changed on the manu, then the second line of code creates the global variable tempfill then add the value of autoFillCheck to it, which is the value of the menu auto-fill checkbox.
If msg is not equal to self.AUTOFILL, the conditional statement goes to the next if.
elseif (msg == self.AUTOOUTLINE) then
tempOutline = self.autoOutlineCheck:Value()
self.autoOutline = tempOutline
tempOutline = self.autoOutlineCheck:Value()
self.autoOutline = tempOutline
Now, elseif checks if msg contains the name self.AUTOOUTLINE, which is the name of the auto-outline checkbox. Again, if msg = self.AUTOOUTLINE, it means that the auto-outline checkbox was changed on the menu.
In that case, the second line of code creates the global variable self.autoOutline and assigns the new value of the auto-outline checkbox to it.
Again, if msg is not equal to self.AUTOOUTLINE, the conditional statement goes to the next if.
elseif (msg == self.GEARSIZE) then
tempSize = self.gearSizeTxt:IntValue()
if (tempSize < 1) or (tempSize > 5) then
LM.GUI.Alert(LM.GUI.ALERT_INFO, "Only values from 1 to 5 are accepted")
return
end
self.gearSize = tempSize
tempSize = self.gearSizeTxt:IntValue()
if (tempSize < 1) or (tempSize > 5) then
LM.GUI.Alert(LM.GUI.ALERT_INFO, "Only values from 1 to 5 are accepted")
return
end
self.gearSize = tempSize
This time, IF checks to see if msg contains the name self.GEARSIZE, in other words, it wants to know if the gear size text field was changed in the script menu.
If it is the case, the second line of code creates the global variable tempSize and assigns the new value of the gear size text field from the menu to it.
If not, the conditional statement goes to the next if.
elseif (msg == self.CREATE) then
tempSize = self.gearSizeTxt:IntValue()
tempFill = self.autoFill
tempOutline = self.autoOutline
tempSize = self.gearSizeTxt:IntValue()
tempFill = self.autoFill
tempOutline = self.autoOutline
Fot the last conditional statement of this block, IF checks if msg contains the name self.CREATE, which if the case, means that the create button was pressed on the script menu.
if so, it creates 3 global variables for the 3 fields of the menu and assigns their current values to each of them.
If not, the conditional statement ends.
if (tempSize < 1) or (tempSize > 5) then
LM.GUI.Alert(LM.GUI.ALERT_INFO, "Only values from 1 to 5 are accepted")
else
gc_gear:creategear(moho, tempSize, tempFill, tempOutline)
LM.GUI.Alert(LM.GUI.ALERT_INFO, "Only values from 1 to 5 are accepted")
else
gc_gear:creategear(moho, tempSize, tempFill, tempOutline)
In this block, IF checks if the tempSize global variable is smaller then 1 or greater then 5.
If so, the second line of code displays a message warning that values have to be within 1 and 5.
If not, the function creategear is called, and the moho module, the tempSize, tempFill and tempOutline variables are passed as arguments.
end
end
end
end
end
In this last block of the menu section, We have the end statements that closes all of the IF conditional statemnts.
-- **************************************************
-- The guts of this script
-- **************************************************
-- The guts of this script
-- **************************************************
This comment tells us that We are entering the main part of the script. This is where We will actually build the gear based on the data entered in the menu.
function gc_gear:creategear(moho, tempSize, tempFill, tempOutline)
This line creates the creategear function, which will use the data provided by the menu items to create the actual gear. This is the function We called in one of the previous blocks of code.
The menu data is passed to the function between the parentheses, that is, the moho module variable, the size of the gear, whether the fill and outline checkboxes are checked or not.
local mesh = moho:Mesh()
if (mesh == nil) then
return
end
if (mesh == nil) then
return
end
The first line of this block of code creates a global variable called mesh, and it does so using the mesh() class from the moho module.
On the second line, IF checks to see if mesh is nill or not. If it is nill, then it means that We are not on a vector layer.
If this is the case, the third line of code is executed, ending the script.
local circleCurvature = 0.391379
local v = LM.Vector2:new_local()
local v = LM.Vector2:new_local()
On this block of text We create the local variable circleCurvature and We assing 0.391379, We will use that information later.
The second line creates the local variable v, which will be used to store the coordinated of the circles that will compose our gear.
It is good to note that since these local variables are created at the start of our main function, that they will be available throughout the function and its sub-functions.
moho.document:PrepUndo(moho.layer)
moho.document:SetDirty()
mesh:SelectNone()
moho.document:SetDirty()
mesh:SelectNone()
On the first line of code from this block, We use the function PrepUndo((), which tells Anime Studio that from this point on, this document changes will be undoable.
On the second line We use the SetDirty() function to tell Anime Studio that changes we're made to the document and that the user should be offered to save it before exit.
The We use the SelectNone() function to deselect everything on the document.
gearArray = {}
gearArray[1] = {curves=3, curve1=0.02, curve2=0, curve3=.05, curve4=0.1, splitCurve=9, scale=.75}
gearArray[2] = {curves=4, curve1=0.04, curve2=0.06, curve3=0.15, curve4=0.2, splitCurve=19, scale=.88}
gearArray[3] = {curves=4, curve1=0.06, curve2=0.09, curve3=0.25, curve4=0.3, splitCurve=29, scale=.92}
gearArray[4] = {curves=4, curve1=0.08, curve2=0.15, curve3=0.35, curve4=0.4, splitCurve=39, scale=.94}
gearArray[5] = {curves=4, curve1=0.1, curve2=0.15 , curve3=0.45, curve4=0.5, splitCurve=49, scale=.955}
In this block of code, We use the table property to create an array named gearArray.
Then We insert 5 rows of data, each row is indexed from 1 to 5 and includes the following data...
curves: The number of curves in the gear.
curve1: The diameter of curve 1.
curve2: The diameter of curve 2.
curve3: The diameter of curve 3.
curve4: The diameter of curve 4.
splitCurve: The number of segments to split the outer curve.
This information will later be used as the bases to create our gear.
for i = 1, 4 do
local curveTemp = "curve" .. i
local pointTemp = gearArray[tempSize][curveTemp]
if(pointTemp ~= 0) then
v.x = -pointTemp
v.y = 0
mesh:AddLonePoint(v, moho.layerFrame)
v.x = 0
v.y = pointTemp
mesh:AppendPoint(v, moho.layerFrame)
v.x = pointTemp
v.y = 0
mesh:AppendPoint(v, moho.layerFrame)
v.x = 0
v.y = -pointTemp
mesh:AppendPoint(v, moho.layerFrame)
v.x = -pointTemp
v.y = 0
mesh:AppendPoint(v, moho.layerFrame)
local numPoints = mesh:CountPoints()
mesh:WeldPoints(numPoints-1, numPoints-5, 0)
local numPoints = mesh:CountPoints()
for ii = 1, 4 do
mesh:Point(numPoints-ii):SetCurvature(circleCurvature, 0)
end
end
end
In this block of code We actually build the curves needed to make our gear based on the information that We entered in the array from the previous block.
On the first line We create a loop that counts from 1 to 4 using the variable "i" as the counter.
Then We create the local variable "curveTemp" and "pointTemp to read the data needed to create the circles from the array.
Then, using v.x and v.x and the AddLonePoint() and AddPoint() functions, We create the points We need to create the circles for our gear.
Then We create a loop that loops through all the points We have created and set the curvature with the SetCurvature() function.
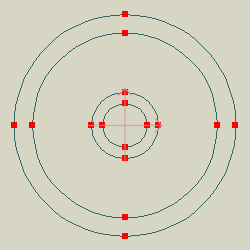
Now We should have something similar to this.
local numPoints = mesh:CountPoints()
mesh:SelectNone()
mesh:Point(numPoints-1).fSelected = true
mesh:SelectConnected()
mesh:SelectNone()
mesh:Point(numPoints-1).fSelected = true
mesh:SelectConnected()
In this block of code, We do another point count.
We deselect all points with the SelectNone() function.
Ten We select the first point of the last of our newly created circles curve with the sSelected function.
And then We select all the points connected to that curve with the SelectConnected() function.
local splitCount = gearArray[tempSize]["splitCurve"]
On this line of code, We retrieve the splitCount value from our array and We assign it to the local variable "splitCount".
for curveID = 0, mesh:CountCurves() - 1 do
local curve = mesh:Curve(curveID)
local ptCount = curve:CountSegments() * splitCount
local pts = {}
for segID = curve:CountSegments() - 1, 0, -1 do
if (curve:IsSegmentSelected(segID)) then
for i = splitCount, 1, -1 do
local v = curve:PointOnSegment(segID, i / (splitCount + 1))
table.insert(pts, v)
end
end
end
local ptID = 1
for segID = curve:CountSegments() - 1, 0, -1 do
if (curve:IsSegmentSelected(segID)) then
for i = 0, splitCount - 1 do
mesh:AddPoint(pts[ptID], curveID, segID, moho.layerFrame)
ptID = ptID + 1
end
end
end
end
I will not explain the content of this block, as it is out of the scope of this tutorial.
It suffice to say that it uses several functions to split the 4 points of the last curve We created into several points based on the value of the splitCurve variable.
We should have something similar to this.

local numPoints = mesh:CountPoints()
local newPoints = splitCount * 4 + 4
local startPoint = numPoints - newPoints
local newPoints = splitCount * 4 + 4
local startPoint = numPoints - newPoints
In this block We get a new points count.
Then We set a new local variable called "newPoints", which stores the numbers of points in our newly splited circle.
Then We create the local value startPoint, which will hold the first point of our newly splited circle.
for i = startPoint, numPoints-1 do
mesh:Point(i):SetCurvature(MOHO.PEAKED, 0)
end
mesh:Point(i):SetCurvature(MOHO.PEAKED, 0)
end
On the first line of this block of code We create a loop.
The loop atarts at the value of startPoint and ends at numPoints.
On the second line, We set the curvature of all the points in our splited circle to peaked with the SetCurvature() class.
mesh:SelectNone()
We deselect all the points in the layer.
basePointsArray = {startPoint, startPoint+3, startPoint+2, startPoint+1}
pointsArray = {}
arrayCounter = 1
arrayCounter2 = 1
pointsArray = {}
arrayCounter = 1
arrayCounter2 = 1
On this block, We setup an array named "pointArray", We then assign it the position values of the 4 first points We create for our circle starting with the value of the startPoint variable, then We substract 1 for each subsequent value for the array.
Then We initialize the pointsArray() array.
We then set counter1 and counter2 to 1.
for i = 1, 4 do
pointsArray[arrayCounter] = basePointsArray[i]
arrayCounter = arrayCounter + 1
for ii = ((startPoint + 3) + arrayCounter2), (((startPoint + splitCount) + arrayCounter2) + 2) do
pointsArray[arrayCounter] = ii
arrayCounter = arrayCounter + 1
arrayCounter2 = arrayCounter2 + 1
end
end
pointsArray[arrayCounter] = basePointsArray[i]
arrayCounter = arrayCounter + 1
for ii = ((startPoint + 3) + arrayCounter2), (((startPoint + splitCount) + arrayCounter2) + 2) do
pointsArray[arrayCounter] = ii
arrayCounter = arrayCounter + 1
arrayCounter2 = arrayCounter2 + 1
end
end
In this block of code We fill our pointsArray array with the order of the points as they we're created on the circle, so that they can be reference later.
for i = 1, newPoints, 4 do
mesh:Point(pointsArray[i]).fSelected = true
mesh:Point(pointsArray[i+1]).fSelected = true
end
mesh:Point(pointsArray[i]).fSelected = true
mesh:Point(pointsArray[i+1]).fSelected = true
end
In this block of code, We select every set of two points on the splited circle, We now en-up with something similar to this.

local scaleVar = gearArray[tempSize]["scale"]
mesh:PrepMovePoints()
mesh:ScalePoints(scaleVar, scaleVar, mesh:SelectedCenter())
moho:AddPointKeyframe(moho.frame)
mesh:PrepMovePoints()
mesh:ScalePoints(scaleVar, scaleVar, mesh:SelectedCenter())
moho:AddPointKeyframe(moho.frame)
On the first line of code here We get the amount of scaling needed from our array.
Then We scale the selected points by that amount using the ScalePoints() class.
We should now have something similar to this.

local numPoints = mesh:CountPoints()
local numCurves = gearArray[tempSize]["curves"]
local newPoints = numPoints - ((splitCount * 4) + (numCurves * 4))
local numCurves = gearArray[tempSize]["curves"]
local newPoints = numPoints - ((splitCount * 4) + (numCurves * 4))
Again, We get the amount of points in our scene.
We then get the number of curves in our gear from our array. This is because the gear with the smallest size is too small to be made of 4 curves like the other, so it was set for 3 curves instead.
Then We calculate the amount of points in our gear based on the number of curves making it.
mesh:SelectNone()
mesh:Point(numPoints-1).fSelected = true
mesh:Point(newPoints).fSelected = true
mesh:SelectConnected()
mesh:Point(numPoints-1).fSelected = true
mesh:Point(newPoints).fSelected = true
mesh:SelectConnected()
Here We deselect all the points in our scene, and select 1 point on the smallest and the largest curves that are making our gear, then We select all the points connected to those curves.
local shapeID = moho:CreateShape(tempFill)
mesh:Shape(shapeID).fHasOutline = tempOutline
mesh:Shape(shapeID).fHasOutline = tempOutline
On this block of code We assign a shape to the selected curves using the CreateShape() class.
If the variable tempOutline that was passed to our main function was set to false, in other words, if We unchecked the auto-fill checkbox in our script menu in Anime Studio, then the fhasOutline will make sure that only a stroke will be assigned to the curves making our gear.
mesh:SelectNone()
Deselect all points in our scene.
mesh:Point(newPoints+5).fSelected = true
mesh:Point(newPoints+9).fSelected = true
mesh:SelectConnected()
mesh:Point(newPoints+9).fSelected = true
mesh:SelectConnected()
This bloc of code selects a point on the curves inside the gear and select all the points connected to them, in fact selecting both curves.
local shapeID = moho:CreateShape(false)
mesh:Shape(shapeID).fHasOutline = tempOutline
mesh:Shape(shapeID).fHasOutline = tempOutline
Again, the CreateShape() class, in conjunction with the fhasOutline creates the strokes for the inner curves of our gear.
mesh:Point(numPoints-1).fSelected = true
mesh:Point(newPoints).fSelected = true
mesh:SelectConnected()
mesh:Point(newPoints).fSelected = true
mesh:SelectConnected()
Again We select points on both the largest and smallest curves and select all points connected to them, in fact leaving us with a fully selected gear in our workspace.
moho:UpdateUI()
end
end
This line of code updates the user interface, which makes sure that no tools was turned off by our messing with the document.
This is it, We been through the code of our gear making script, but it does not stop there.
ICON: A tool script needs an icon, and though not absolutely necessary, it would look much better then the default icon that Anime Studio displays when a tool has not icon of its own.
Tool icons are 24 pixels wide by 20 pixels high, they are usually 24 bits images with alpha channels, or 32 bits images.
You could make an icon that is only 8 bits, that is 256 colors, but it wont look as good, especially if you use transparency.
The icon should be saved as PNG, have the same name as the script and put in the same directory.
Here is a zoomed in version of the icon that comes with the gear script.
HOW TO USE THE SCRIPT
To install the script is easy, you only need to copy both the script and its icon in the Scripts/tool folder in your Anime Studio install folder.
Next time you launch Anime Studio, the icon will appear at the bottom of your tools palette at the left.
Click the icon and the menu will appear at the top of your Anime Studio interface.
You then only need to choose whether you want a fill or outline, the size of the gear, 1 - 5, then click create.
To make things easier, select the color and stroke size in the styles palette before you click the Create button, this way your gear will inherit those attributes, that is if you choose to have a fill and outline of course!
REFERENCES
There is very little documentation on scripting in Anime Studio, but you can find some at these addresses.
Anime Studio V8 scripting interface. (Right-click then save as.)
http://www.lostmarble.com/downloads/pkg_moho.lua_pkg
Anime Studio V6.1 scripting interface.
http://my.smithmicro.com/downloads/files/AnimeStudio6.1ScriptingInterfaces.zip
Anime Studio 5.x scripting documentation.
http://www.lostmarble.com/moho/extras/scripts/moho_scripting.zip
In these documents you can find information on the constants, functions and classes you will need to make scripts for Anime Studio.
You can also find a very good online book on Lua scripting at this address.
http://www.lua.org/pil
Also, the best references are the scripts themselves, look at them, study them.
You can also copy and paste from existing scripts if it helps you.
TOOLS
To be able to script you only need a basic text editor, Notepad on Windows is a good example.
There is a freeware text editor that I like allot and that I use and that is Programmer's notepad, it has all that you need to script in Lua and it runs on Windows platform.
Another tool that I use allot is the freeware version of the File Search Assistant.
What the File Search Assistant does, is help you search for a certain word or phrase in a file or folder of files of several types.
So, say I want to find scripting examples of the CreateShape() class in the Scripts folder, easy, I just point File Search Assistant to the proper folder, type in the search word or phrase, then hit the search button.
Then a list of the scripts containing the word CreateShape appears, and I only need to click one of the files.

This is a tremendous time saver when looking for references in existing scripts, but it can search almost any types of files, including PDF files.
CONCLUSION
Well, this is it. We had a good look at an existing script, We went through some of the most used functions and classes available to make good scripts in Anime Studio.
I know this is allot to digest, that it may look quite complicated and even intimidating at first, but it is well worth the effort.
My suggestion to you is to take it slowly, read it as a book at first, don't try to swallow it all, then read it a few more times, then try to get your head around it.
Took me quite a bit of work to learn Lua scripting to a decent level, and I don't know anyone who picked it up in just a few hours, you need to start slow and keep at it, and it will become second nature.
I also want to thanks the good peoples at The Animator's Forum for their help in building the script for this tutorial, in particular Paul (hayasidist) who spent the time helping me iron out the quirks in my initial script, thank you very much Paul!
I hope this tutorial helped get a better understanding of Lua scripting in Anime Studio and I hope that you will soon be building scripts of your own and that you will share them with the Anime Studio community.
Gilles
Hi! Thanks for the tutorial.. I was wondering what would you put for the guts of the script or like what would you add for a "Freehand" tool?
ReplyDeleteI'm working on a freehand tool that has different speeds it goes from normal->slow and the incrementals are 0 to 10.
Is this even possible to make? Ive been working really hard thanks to you and these tutorials.
Hello Chantie.
ReplyDeleteWhat is it exactly that this freehand tool You are working on does, and how do You want to implement it in Anime Studio?
I Am trying to make a tool that makes the freed hand, delay or be a bit offset that way the arc of the line won't be so wobbly when you draw. It will start from 0 and the last of the strength will be 10. The higher it goes the more harder It lags behind the mouse.
ReplyDeleteAfter reading on the freehand tool in AS 9.x, it seems that it was enhanced to smooth the curve by default, which seems to be the case after I tried it, could be good for fast inking of comics and such!
DeleteIt does? I have that Anime Studio Pro 9.0 but it doesn't do that? Hmmn :o
DeletePage 33 of the users manual, and the strokes are pretty smooth on my side!
DeleteWhere does it say that on page 33 ?
DeleteThe Freehand tool has been improved to give
Deletemuch smoother looking curves. As you draw
with the Freehand tool it looks like you are creating a lot
of points, but as you let go it only keeps the points that
are necessary to represent the curve smoothly.
Hmmn well it doesn't do that for me..?
DeleteIn other words You want to create a function that stabilize the stroke as You draw, a bit like in Manga Studio and Illustrator.
ReplyDeleteCant really help there, as I never use the freehand tool myself, so I never bothered to look into it.
My advice would be to go to the animator's forum, as there are scriptwriters there who may be able to answer your question, the link is in the donation section at the top of this blog!
Hey Gilles, I was really looking for a detailed step by step guide for anime tool script, thank you for providing it!
ReplyDelete